
How to be an Instagram Photographer
Some people don’t have the time, money, or ambition to be a professional photographer. This article is for you. I will have images in this post taken strictly from an iPhone 6 and edited on the Instagram app. There are several apps that have features for editing but I will be focusing on the one we all know and love.

Josh Dun of Twenty One Pilots taken on an iPhone 6 in Indianapolis, IN. Taking this image I held down the shutter in order to take several images at once. I managed to catch Josh at the top of his swing which is the slowest point in his arm movements. Turned out to be an amazing shot.
First, we have to take an image. I will quickly run through a few tricks using an iPhone camera but I will not bother you with things I think most people know how to do on their phones.
1. Press and hold on your phone on the subject. This will lock your autofocus on your subject. A great way to do other things on your phone and know you can go back and your subject will be in focus.
2. Once locked on your image slide your finger up or down. This will brighten or darken your image. When you’re in a dark space like a concert is a good time to do this.
3. Press and hold the shutter to capture several images back to back. This can help you get moving objects or that person that blinks too much!
4. NEVER NEVER NEVER zoom in. When you zoom in quality goes to shit. You can never get a good image when you zoom in and everyone knows you took that shot on a cell phone.
5. If you are doing skylines or something not moving check out HDR for better quality images.
6. Timer is great for the person that forgot their selfie stick. Set your phone down on a shelf and throw up that peace sign.
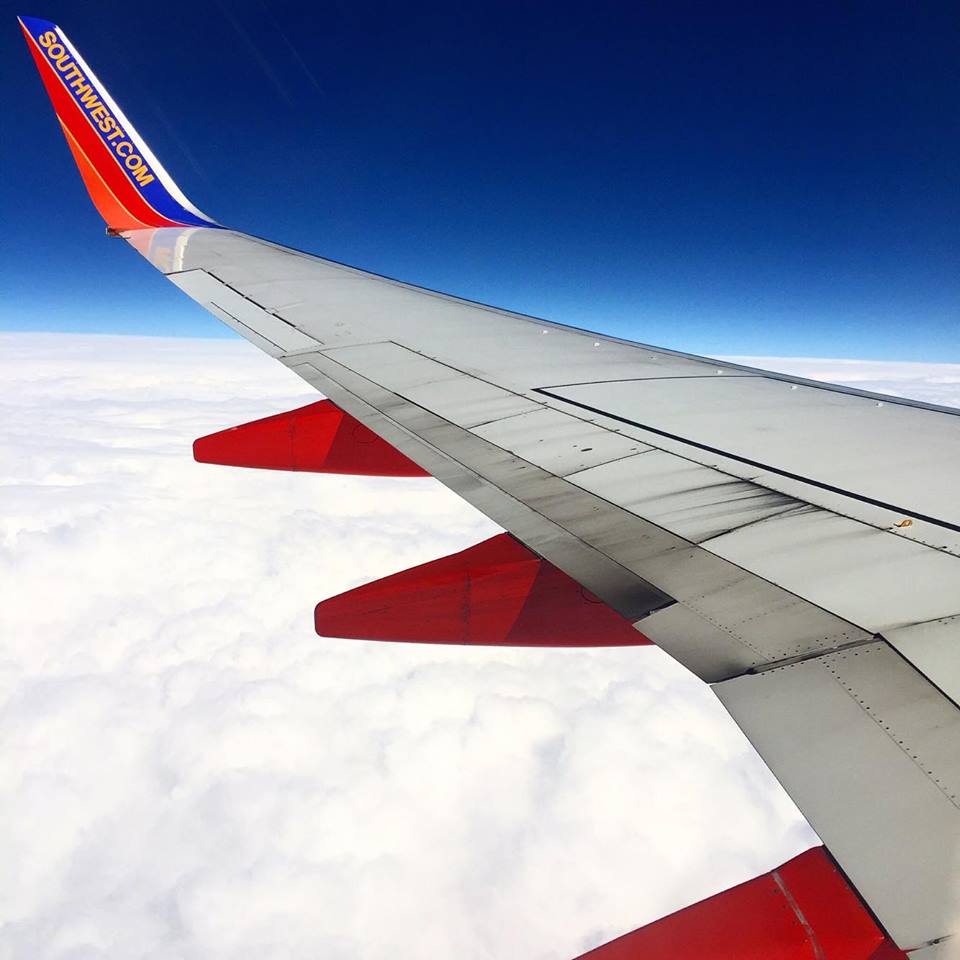
Taken thousands of feet up in the air this one was even liked by Southwest on Twitter. After snapping this I went to the saturation and added just a bit and a bit the sharpen option as well. Love this shot!
Next, use a filter if you want. I don’t usually use them but now and again it’s just easier. You can always start with an Instagram created filter and follow up by making your custom edits to your image in the editing section.
Lastly, edit your image. I will run down each edit option below and explain what they do. They best way to see how these work are to try them. Try these out and tag @iamstevensewell so I can see your #instagramphotography!

One World Trade Center aka Freedom Tower - I visited NYC in the fall of 2015 and snapped this going into the tower. This building has these amazing windows that needed to be documented. I added a bit of sharpen here and not much else. What a beautiful fall day it was.
Adjust: On the top left you’ll find a symbol much like the # sign. This allows you to change guidelines. Make sure you have these on if you are using anything else on edit screen. On the top right is an arrow. The arrow turns the image. Sometimes when I take a snapshot with my phone the image appears upside down. Click the arrow a few times and it’ll fix that issue quick! In the middle you have three boxes with lines through them. These allow for image manipulation of perspective. Vertical, horizontal, and straighten. Click the one you want and scroll the wheel on the bottom to change your perspective. I rarely use vertical or horizontal but straighten will come in handy when you find lines are off a bit.
Brightness: This one is simple. Brightens or darkens your image. If I have a colorful image I usually try to brighten it. If I am trying to be more emo I tend to darken my shot a bit.
Contrast: Contrast is great because it can add more definition or mood to your images. I often take the contrast up a bit. About 10% give or take pending image need.
Structure: This option is great, as it tends to add more detail and contrast to your image. I find it’s easy to add too much contrast if you use both Contrast and Structure. Keep an eye on your image to be sure you don’t miss that!
Warmth: This is one of my favorite edit options that nearly all smartphone apps have. If you go right the image will appear warmer. If you go left it’ll appear cooler. Why would we want this? If you have a blue tint to your image it appears a bit more emotional or colder. By doing this we have control of the mood our image portrays.
Saturation: This one allows you to enhance overall colors or take away colors if you want your image to be black and white. When I take a shot and think I need it in black and white this is where I start.
Color: You have two options in the Color option, Shadows or Highlights. These allow you to add one color to the either the shadows or the highlights of your images. Pretty cool if you want to change the mood you’re portraying.
Fade: I love the Fade option as I can dull down my images or make them look a bit older. This one is essentially adding a bit of even fog over your image.
Highlights: Allows you to adjust lighting of your highlights up or down.
Shadows: Adjust lighting of your shadows up or down.
Vignette: This allows you to fade the background without a definite border. Sort of focuses your eyes on your subject a bit more.
Tilt Shift: 3 options here.
- Off is the image as you took it.
- Radial has the center circle of the image focused and blurs everything outside of the circle.
- Linear has a line focused and everything outside of that blurred.
*NOTE: You can move these to find your subject anywhere on your image.
Sharpen: Sharpen is great as it digitally sharpens your image. Most of us will never print our iPhone photography and this feature is a great way to make your images pop a bit more than your friends’ images. Try this one out for sure!

Really made those greens pop buy taking the saturation up a bit. I bet you've seen that a few times here but its important to pop those colors in warm pictures.
Now it’s your turn. Get out there and take your shots! Tag @iamstevensewell so I can see your #instagramphotography!

Held that autofocus so I could focus on the drops and cranked that sharpen a bit.
Thanks for reading!
SS